
Vanilla Snow Ice Cream
Vanilla Snow Ice Cream is a delightful twist on traditional ice cream, offering a light, fluffy texture reminiscent of freshly fallen snow. This unique dessert not only tantalizes the taste buds but also brings a sense of nostalgia, evoking memories of snowy days and cozy gatherings. Whether you’re looking to impress guests or simply indulge in a treat, this recipe is a must-try!
Key Takeaways:
- Preparation time: 20 minutes (plus freezing time)
- Difficulty level: Easy
- Main ingredients: Heavy cream, milk, sugar, vanilla extract, and snow (or crushed ice)
- Special techniques: Whipping cream to soft peaks and incorporating snow/ice
- Storage information: Store in an airtight container in the freezer for up to one week
Introduction to Vanilla Snow Ice Cream:
Vanilla Snow Ice Cream has its roots in the age-old tradition of using fresh snow to create cool and refreshing treats. The concept dates back to when settlers would collect snow and mix it with sweeteners and flavors, creating a simple yet delicious dessert. This method of utilizing snow as a primary ingredient was particularly popular in regions with heavy snowfall, where it became a seasonal favorite.
As time progressed, the recipe evolved, incorporating cream and vanilla to enhance its richness and flavor. Today, Vanilla Snow Ice Cream is cherished not only for its delightful taste but also for its nostalgic connection to childhood memories of winter fun. This dessert symbolizes simplicity and joy, making it a perfect addition to any gathering or a cozy night in. The allure of Vanilla Snow Ice Cream lies in its ability to transport you back to carefree days, all while indulging in a creamy, dreamy treat that feels like a winter wonderland.
Ingredients for Vanilla Snow Ice Cream:
- 2 cups heavy cream: Provides the rich, creamy base for the ice cream.
- 1 cup whole milk: Adds a smooth texture and balances the richness of the heavy cream.
- 3/4 cup granulated sugar: Sweetens the mixture without overpowering the vanilla flavor.
- 2 teaspoons vanilla extract: Infuses the ice cream with a warm, aromatic flavor.
- 8 cups clean, fresh snow (or crushed ice): Serves as the unique base of the ice cream, giving it the signature light, fluffy texture.
Preparation Steps for Vanilla Snow Ice Cream:
1. Gather your ingredients: Ensure you have all the ingredients measured and ready to use. If you’re using snow, make sure it is clean and free from impurities.
2. Mix the cream and milk: In a large bowl, combine the heavy cream, whole milk, and granulated sugar. Whisk the mixture until the sugar is fully dissolved and the mixture is smooth.
3. Add vanilla extract: Stir in the vanilla extract, ensuring it is evenly distributed throughout the cream mixture.
4. Whip the cream: In a separate bowl, use an electric mixer to whip the heavy cream until soft peaks form. Be careful not to overwhip, as you want a light and airy texture rather than stiff peaks.
5. Combine with snow: Gently fold the whipped cream into the cream and milk mixture. Then, gradually add the fresh snow (or crushed ice) while folding gently until everything is well combined and fluffy.
6. Taste and adjust: Taste the mixture and adjust the sweetness if necessary by adding more sugar, though this is typically not needed.
7. Freeze the mixture: Transfer the mixture into an airtight container and freeze for at least 4 hours or until firm. If using crushed ice, ensure it is well mixed and evenly distributed.
8. Serve: Once frozen, scoop out the Vanilla Snow Ice Cream into bowls or cones and enjoy!
For a delicious variation, consider trying Making Lemon Powder Easy Enhance Desserts Dishes, which offers a different spin on frozen treats!
Flavor Profile of Vanilla Snow Ice Cream:
The flavor profile of Vanilla Snow Ice Cream is a harmonious blend of creamy sweetness and aromatic vanilla. The rich, velvety texture of the whipped cream combines beautifully with the lightness of the snow, creating a dessert that is both indulgent and refreshing. Each bite melts in your mouth, releasing a delicate sweetness that lingers on the palate.
The aroma is equally inviting; the warm scent of vanilla wafts through the air, enhancing the overall experience. The snow adds an element of novelty, creating a delightful contrast in texture that is both fluffy and creamy. This dessert is perfect for those who appreciate the simplicity of vanilla while enjoying a unique twist on a classic favorite.
Benefits of Vanilla Snow Ice Cream:
While indulgent, Vanilla Snow Ice Cream does offer some nutritional benefits, especially when made with wholesome ingredients. Heavy cream and whole milk provide a good source of calcium and fat, which can contribute to a feeling of fullness and satisfaction. The sugar content, while present, can be adjusted according to personal preference and dietary needs.
Additionally, making Vanilla Snow Ice Cream at home allows you to control the ingredients, ensuring a fresher, more natural product without the preservatives and additives found in many store-bought ice creams. This homemade treat can be enjoyed in moderation as part of a balanced diet, making it a delightful way to satisfy your sweet cravings without compromising on quality.
Serving Suggestions for Vanilla Snow Ice Cream:
Vanilla Snow Ice Cream can be enjoyed in many ways, making it a versatile dessert. Here are a few serving suggestions to elevate your experience:
1. Top with fruits: Fresh berries or sliced bananas provide a beautiful contrast in flavor and add a touch of natural sweetness.
2. Drizzle with chocolate sauce: A rich chocolate sauce or hot fudge can take the dessert to the next level, adding a decadent twist to the vanilla base.
3. Sprinkle with nuts: Chopped almonds, walnuts, or pecans add a delightful crunch and a nutty flavor that complements the creamy ice cream beautifully.
4. Serve in cones: For a fun and portable option, scoop the Vanilla Snow Ice Cream into sugar cones or waffle cones for a classic ice cream experience.
5. Pair with warm desserts: Serve it alongside a warm brownie or a slice of pie for a delightful contrast between hot and cold, sweet and rich.
For an alternative dessert that pairs well with Vanilla Snow Ice Cream, check out Decadent Chocolate Layer Cake Recipe for inspiration!
Storage Tips for Vanilla Snow Ice Cream:
To ensure your Vanilla Snow Ice Cream remains fresh and delicious, proper storage is key. Here are some tips to keep in mind:
1. Use an airtight container: Transfer the ice cream into a clean, airtight container to prevent freezer burn and maintain its creamy texture.
2. Label and date: Always label your container with the date it was made. Vanilla Snow Ice Cream is best enjoyed within a week for optimal flavor and texture.
3. Avoid temperature fluctuations: Store the ice cream in the coldest part of the freezer, away from the door, to minimize temperature changes that can affect its consistency.
4. Scoop only what you need: When serving, use a clean ice cream scoop or spoon to prevent contamination and keep the remaining ice cream fresh.
By following these storage tips, you can enjoy your Vanilla Snow Ice Cream for days to come, allowing you to savor the delightful flavors long after making it.
Conclusion:
In summary, Vanilla Snow Ice Cream is a charming and whimsical dessert that brings joy to any occasion. With its light, fluffy texture and rich vanilla flavor, this delightful treat is perfect for both warm summer days and cozy winter nights. Whether you’re making it for a special gathering or simply for yourself, this recipe is bound to become a favorite. So why not gather your ingredients and give it a try? You won’t regret indulging in this sweet and creamy delight!
FAQ Section:
1. Can I use store-bought snow?
- It’s best to use clean, fresh snow to ensure the best flavor and safety. Store-bought snow isn’t typically available, and using crushed ice is a great alternative.
2. Is it safe to eat snow?
- Yes, as long as it is clean and free from contaminants. Avoid snow collected near roads or in areas with high pollution.
3. Can I make this recipe vegan?
- Yes, you can substitute heavy cream and milk with coconut cream and almond milk, and use a plant-based sweetener.
4. How can I adjust the sweetness?
- You can modify the sugar content according to your taste preference by adding more or less sugar to the cream mixture.
5. What can I use instead of vanilla extract?
- You can use vanilla bean paste or even ground vanilla beans for a more intense vanilla flavor.
6. Can I add mix-ins like chocolate chips or sprinkles?
- Absolutely! Just fold them in gently after combining the snow and cream mixture for added fun and flavor.
7. How do I know when the ice cream is ready?
- The ice cream is ready when it is firm to the touch and holds its shape when scooped.
8. Can I make this recipe without a mixer?
- Yes, you can whisk the cream by hand, but it will require more effort to achieve the desired fluffy texture.
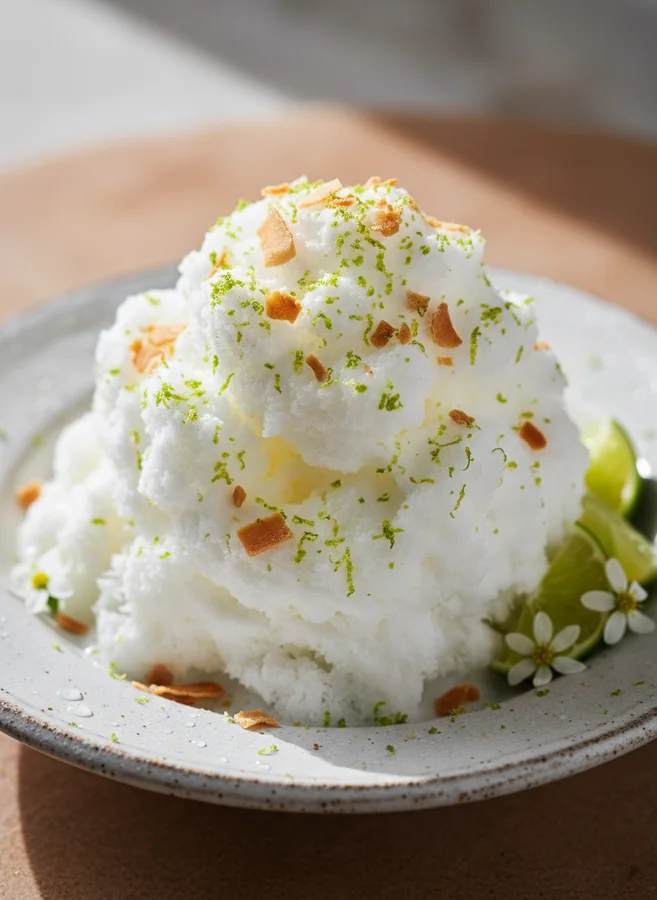
Vanilla Snow Ice Cream
INGREDIENTS
- 4 cups of freshly fallen snow (or crushed ice)
- 1 cup coconut milk (full-fat)
- 1/2 cup granulated sugar
- 1 teaspoon pure vanilla extract
- Zest of 1 lime
- 1 tablespoon fresh lime juice
- A pinch of salt
- Optional: Toasted coconut flakes for garnish
INSTRUCTIONS
In a mixing bowl, combine coconut milk, sugar, vanilla extract, lime zest, lime juice, and salt. Whisk until smooth.
In a large bowl, gather fresh snow or crushed ice. Pour the coconut milk mixture over the snow and fold gently.
Taste the mixture and adjust sweetness or lime flavor as needed.
Scoop into bowls or cups and top with toasted coconut flakes if desired.
Enjoy immediately or store in an airtight container in the freezer.
NOTES
Serve chilled or at room temperature. Enjoy your delicious homemade Vanilla Snow Ice Cream!