
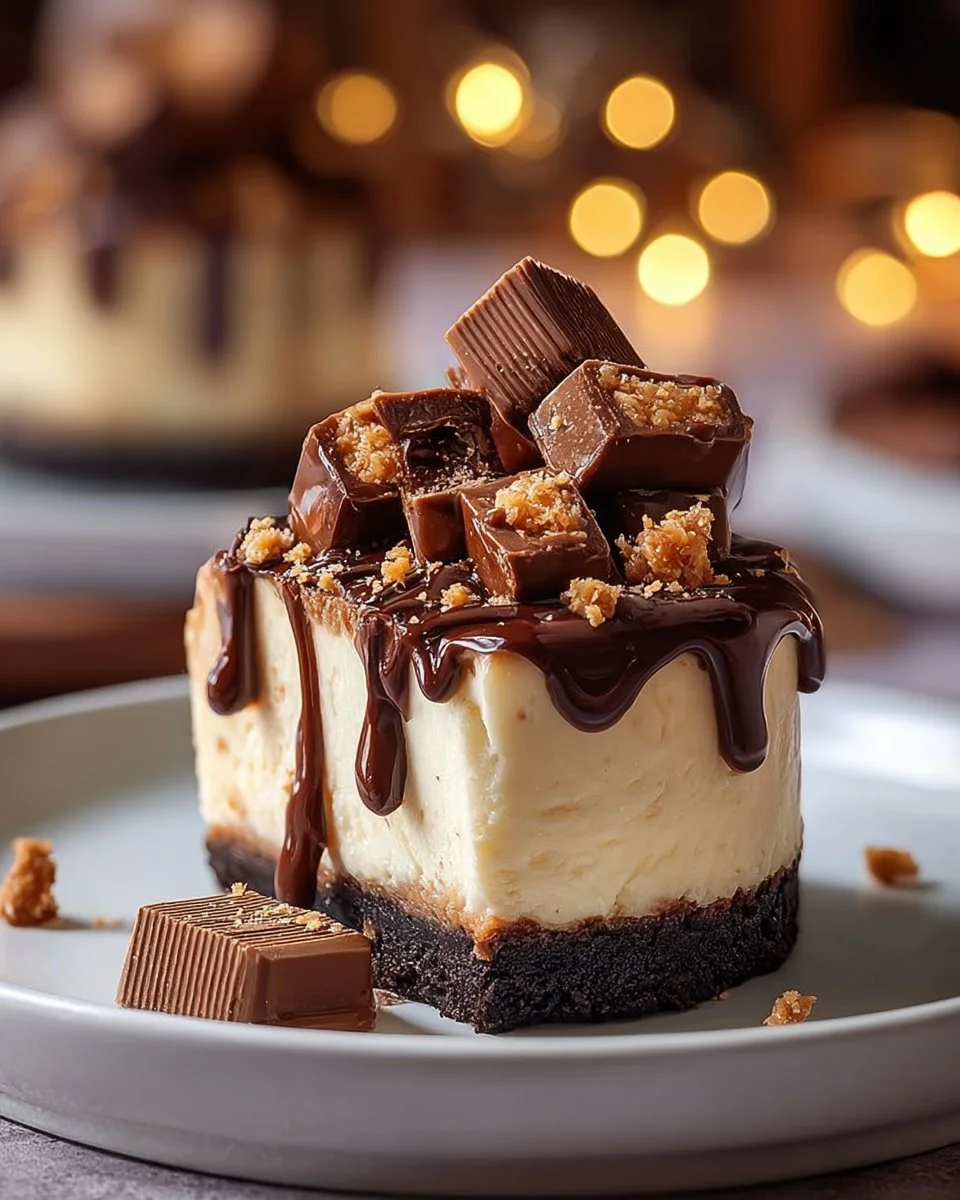
Mini Twix Cheesecakes
If you love the delicious combination of chocolate, caramel, and creamy goodness, then Mini Twix Cheesecakes are perfect for you! These bite-sized treats bring the flavors of your favorite candy bar into a delightful cheesecake form. They are easy to make and perfect for parties, gatherings, or just a sweet treat at home.
Why Make This Recipe
Making Mini Twix Cheesecakes is a fantastic choice for several reasons. First, they are simple and quick to prepare. You can whip these up even if you are new to baking. Second, they are a crowd-pleaser! Everyone loves the blend of creamy cheesecake with chocolate and caramel. Finally, they are easy to serve, making them great for parties or family events.
How to Make Mini Twix Cheesecakes
Ingredients
- 1 1⁄2 cups graham cracker crumbs
- 6 tablespoons butter, melted
- 16 oz cream cheese, softened
- 2/3 cup granulated sugar
- 2 tablespoons flour
- 1 teaspoon vanilla extract
- 1⁄4 cup caramel sauce
- 1⁄4 cup heavy whipping cream
- 2 large eggs
- 1⁄2 cup semi-sweet chocolate
- 1⁄4 cup heavy whipping cream (for ganache)
- Caramel sauce (for drizzling)
- Mini Twix candy bars (for topping)
Directions
- Preheat your oven to 350°F (175°C).
- Process the graham crackers in a food processor until you have 1 1⁄2 cups of crumbs.
- Add the melted butter to the crumbs and pulse until combined.
- Divide the mixture among cupcake molds and press down gently to form the crust.
- In a mixer, cream the softened cream cheese for 2-3 minutes until smooth.
- Add the granulated sugar and flour, mixing until combined.
- Pour in the vanilla extract and caramel sauce; mix until smooth.
- With the mixer on low, add the heavy cream; then increase to high speed for 1 minute.
- Add the eggs one at a time, mixing just until combined after each addition.
- Divide the batter among the prepared molds and bake for 13-15 minutes, until the center jiggles slightly.
- Allow them to cool on a wire rack, then refrigerate for at least 3 hours to set.
- Once cooled, drizzle the cheesecakes with caramel sauce and refrigerate again.
- For the ganache, heat the chocolate and 1/4 cup heavy cream in a small pot. Whisk until smooth.
- Top each cheesecake with the ganache, add a swirl of whipped cream, and finish with a Mini Twix candy bar.
- Refrigerate until ready to serve.
How to Serve Mini Twix Cheesecakes
Mini Twix Cheesecakes are perfect to serve as they are! You can place them on a platter for guests to grab and enjoy. If you want, add extra whipped cream and Twix chunks for a fancier presentation. These mini delights are sure to impress everyone!
How to Store Mini Twix Cheesecakes
Store any leftovers in an airtight container in the refrigerator. They will stay fresh for up to five days. If you are not serving them right away, it’s best to keep the ganache and toppings separate until you are ready to enjoy them.
Tips to Make Mini Twix Cheesecakes
- Make sure your cream cheese is softened for easy mixing.
- Don’t skip the chilling time; it helps the cheesecakes set properly.
- Experiment with different toppings, like chocolate curls or nuts!
- For easier removal from the cupcake molds, consider lining them with paper liners.
Variation
If you want to switch things up, try using different candy bars as toppings! Snickers or Milky Way bars can add a new twist to your Mini Cheesecakes. You could also experiment with flavored cream cheese, like chocolate or caramel.
FAQs
Can I make these cheesecakes ahead of time?
Yes! You can make them a day ahead and store them in the refrigerator. Just add the ganache and toppings right before serving.
Can I freeze Mini Twix Cheesecakes?
Yes, you can freeze them! Just make sure they are fully cooled, then wrap them tightly and store in a freezer-safe container. Thaw in the refrigerator before serving.
Can I use a different type of crust?
Absolutely! You can substitute graham cracker crumbs with Oreos or even cookie crumbs for a different flavor. Just follow the same steps for mixing and pressing the crust.
Mini Twix Cheesecakes
- Total Time: 180 minutes
- Yield: 12 servings 1x
- Diet: Vegetarian
Description
Delightful bite-sized cheesecakes featuring the flavors of chocolate, caramel, and creamy goodness, inspired by the classic Twix candy bar.
Ingredients
- 1 1⁄2 cups graham cracker crumbs
- 6 tablespoons butter, melted
- 16 oz cream cheese, softened
- 2/3 cup granulated sugar
- 2 tablespoons flour
- 1 teaspoon vanilla extract
- 1/4 cup caramel sauce
- 1/4 cup heavy whipping cream
- 2 large eggs
- 1/2 cup semi-sweet chocolate
- 1/4 cup heavy whipping cream (for ganache)
- Caramel sauce (for drizzling)
- Mini Twix candy bars (for topping)
Instructions
- Preheat your oven to 350°F (175°C).
- Process the graham crackers in a food processor until you have 1 1⁄2 cups of crumbs.
- Add the melted butter to the crumbs and pulse until combined.
- Divide the mixture among cupcake molds and press down gently to form the crust.
- In a mixer, cream the softened cream cheese for 2-3 minutes until smooth.
- Add the granulated sugar and flour, mixing until combined.
- Pour in the vanilla extract and caramel sauce; mix until smooth.
- With the mixer on low, add the heavy cream; then increase to high speed for 1 minute.
- Add the eggs one at a time, mixing just until combined after each addition.
- Divide the batter among the prepared molds and bake for 13-15 minutes, until the center jiggles slightly.
- Allow them to cool on a wire rack, then refrigerate for at least 3 hours to set.
- Once cooled, drizzle the cheesecakes with caramel sauce and refrigerate again.
- For the ganache, heat the chocolate and 1/4 cup heavy cream in a small pot. Whisk until smooth.
- Top each cheesecake with the ganache, add a swirl of whipped cream, and finish with a Mini Twix candy bar.
- Refrigerate until ready to serve.
Notes
Store leftovers in an airtight container in the refrigerator for up to five days. Keep ganache and toppings separate until ready to serve.
- Prep Time: 15 minutes
- Cook Time: 15 minutes
- Category: Dessert
- Method: Baking
- Cuisine: American
Nutrition
- Serving Size: 1 cheesecake
- Calories: 250
- Sugar: 15g
- Sodium: 200mg
- Fat: 18g
- Saturated Fat: 10g
- Unsaturated Fat: 6g
- Trans Fat: 0g
- Carbohydrates: 30g
- Fiber: 1g
- Protein: 5g
- Cholesterol: 50mg
Keywords: cheesecake, dessert, Twix, mini cheesecakes, party treats, chocolate dessert