
Homemade Strawberry Snow Cone Syrup
Indulging in a homemade strawberry snow cone syrup is a delightful way to capture the essence of summer in a sweet, refreshing treat. This simple recipe allows you to create a vibrant, fruity syrup that will elevate your snow cone experience to new heights, making it perfect for summer parties, family gatherings, or simply a hot afternoon snack.
Key Takeaways:
- Preparation time: 15 minutes
- Difficulty level: Easy
- Main ingredients: Fresh strawberries, sugar, lemon juice, water
- Special techniques: Blending and straining
- Storage information: Can be stored in the refrigerator for up to two weeks
Introduction to Homemade Strawberry Snow Cone Syrup:
Homemade strawberry snow cone syrup is a nostalgic treat that harkens back to childhood summers spent at fairs, carnivals, and beach outings. The origins of snow cones can be traced back to the early 20th century, when ice was finely shaved and topped with flavored syrups. Over the years, snow cones have evolved from simple icy snacks to an exciting array of flavors, with strawberry remaining one of the most popular choices.
Making your own strawberry snow cone syrup allows you to control the ingredients and tailor the sweetness to your taste. Unlike store-bought syrups that often contain artificial flavors and colors, homemade syrup is vibrant, fresh, and bursting with the natural sweetness of ripe strawberries. This syrup not only enhances the flavor of ice but also serves as a reminder of sunny days spent savoring simple pleasures.
Ingredients for Homemade Strawberry Snow Cone Syrup:
- Fresh strawberries (2 cups): The star ingredient that provides natural sweetness and vibrant color.
- Granulated sugar (1 cup): Helps to sweeten the syrup and balance the tartness of the strawberries.
- Lemon juice (2 tablespoons): Adds a hint of acidity, brightening the flavor and enhancing the strawberry taste.
- Water (1 cup): Used to dissolve the sugar and create the syrup base.
Preparation Steps for Homemade Strawberry Snow Cone Syrup:
1. Prepare the strawberries: Start by washing the fresh strawberries thoroughly under cold running water. Remove the green tops and slice the strawberries in half to help them break down more easily during cooking.
2. Combine ingredients: In a medium saucepan, combine the sliced strawberries, sugar, lemon juice, and water. Stir the mixture to ensure that the sugar is evenly distributed among the strawberries.
3. Cook the mixture: Place the saucepan over medium heat and bring the mixture to a gentle simmer. Stir occasionally to help dissolve the sugar and prevent the strawberries from sticking to the bottom of the pan. Allow the mixture to simmer for about 10 minutes, or until the strawberries are soft and have released their juices.
4. Blend the syrup: Remove the saucepan from the heat and let it cool slightly. Using an immersion blender or a regular blender, carefully blend the mixture until smooth. If you prefer a chunkier texture, blend it for a shorter time.
5. Strain the syrup: To achieve a smooth syrup, strain the blended mixture through a fine-mesh sieve or cheesecloth into a bowl or jar. Use a spatula to help push the liquid through while leaving any solids behind.
6. Cool and store: Allow the strained syrup to cool to room temperature before transferring it to a clean jar or bottle. Seal it tightly and store it in the refrigerator. Your homemade strawberry snow cone syrup is now ready to be enjoyed!
Flavor Profile of Homemade Strawberry Snow Cone Syrup:
Homemade strawberry snow cone syrup offers a delightful flavor profile that is both sweet and tangy. The syrup boasts a vibrant red hue, reminiscent of summer sunsets. When you take a taste, the first sensation is the burst of fresh strawberry flavor, followed by a gentle sweetness from the sugar. The addition of lemon juice brings a refreshing zing that enhances the overall experience, making each spoonful exciting. The syrup has a smooth, pourable texture that glides over ice, providing a luscious mouthfeel that complements the crunchiness of shaved ice.
Benefits of Homemade Strawberry Snow Cone Syrup:
Creating your own strawberry snow cone syrup at home not only allows you to enjoy a delicious treat but also comes with several benefits. First and foremost, this syrup is free from preservatives and artificial ingredients commonly found in commercial options. By using fresh strawberries, you can harness the nutritional benefits of this vibrant fruit, which is rich in vitamins, antioxidants, and dietary fiber. Strawberries are known to support heart health, boost the immune system, and promote healthy skin, making them a smart choice for a sweet treat. Plus, by controlling the amount of sugar you use, you can customize the sweetness to suit your dietary preferences.
Serving Suggestions for Homemade Strawberry Snow Cone Syrup:
Homemade strawberry snow cone syrup is incredibly versatile and can be enjoyed in various ways. Of course, the most classic use is drizzling it generously over a mound of finely shaved ice to create the ultimate snow cone. For an elevated experience, consider pairing the syrup with other flavors, such as coconut or vanilla, to create a layered snow cone that tantalizes the taste buds.
Additionally, this syrup can be used as a topping for pancakes, waffles, or yogurt, adding a burst of fruity flavor to your breakfast. You may even want to use it to make a delicious strawberry lemonade by mixing it with sparkling water and fresh lemon juice. The possibilities are endless! For more delicious breakfast ideas, check out this amazing Irresistible Pecan Caramel Cake 2.
Storage Tips for Homemade Strawberry Snow Cone Syrup:
To keep your homemade strawberry snow cone syrup fresh and flavorful, store it in an airtight container in the refrigerator. It can last for up to two weeks, making it a convenient option for summer enjoyment. If you find yourself with a larger batch than you can consume within that time frame, consider freezing the syrup in ice cube trays. Once frozen, transfer the cubes to a zippered freezer bag. This way, you can easily thaw small portions as needed for future snow cones or other delightful treats.
Conclusion:
Homemade strawberry snow cone syrup is an easy and delightful way to bring a taste of summer into your kitchen. With just a few simple ingredients and steps, you can create a fresh, vibrant syrup that elevates your snow cones and other desserts. Whether you’re hosting a summer party or just enjoying a quiet day at home, this syrup will bring joy and sweetness to your day. So grab some ripe strawberries and get started on this delicious recipe!
FAQ Section:
1. Can I use frozen strawberries instead of fresh ones?
Yes, you can use frozen strawberries, but be sure to thaw them first to ensure they release their juices.
2. How can I make this syrup less sweet?
You can reduce the amount of sugar in the recipe to suit your taste. Start with less and adjust as needed.
3. Can I use this syrup for drinks?
Absolutely! This syrup can be used to flavor lemonades, cocktails, or even sparkling water for a refreshing beverage.
4. What other fruits can I use to make snow cone syrup?
You can experiment with other fruits like blueberries, raspberries, or even tropical fruits like mango or pineapple for unique flavors.
5. How do I know if the syrup has gone bad?
If the syrup develops an off smell, unusual color, or visible mold, it’s best to discard it.
6. Can I add food coloring to the syrup?
While the syrup is naturally vibrant, you can add a drop of natural food coloring if you desire a more intense hue.
7. Is there a way to thicken the syrup?
You can simmer the syrup longer to reduce it further, which will naturally thicken it.
8. Can I use alternative sweeteners?
Yes, you can substitute sugar with honey, agave syrup, or other sweeteners, but taste and texture may vary.
Homemade Strawberry Snow Cone Syrup
INGREDIENTS
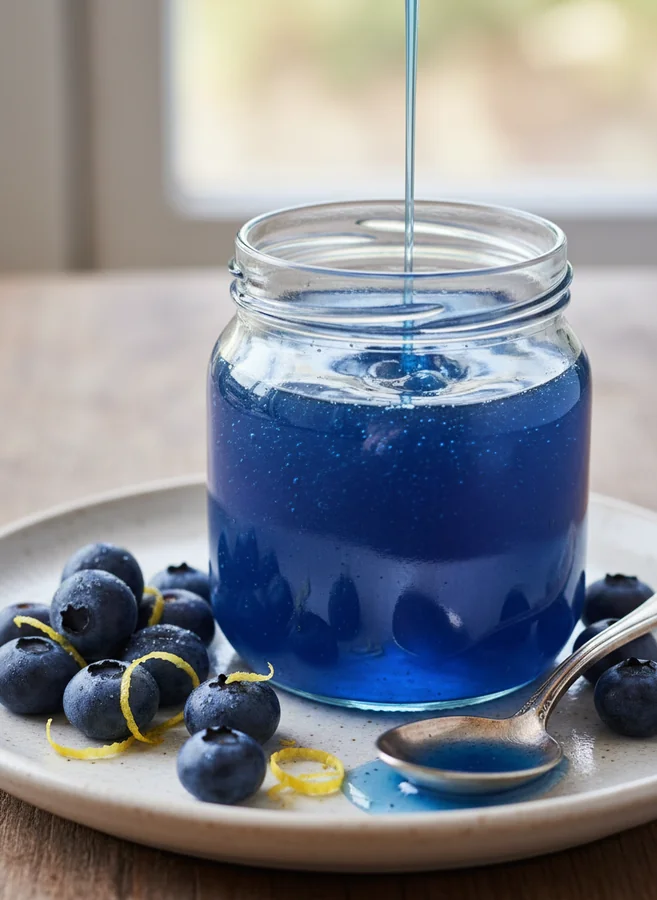
- 2 cups fresh or frozen blueberries
- 1 cup granulated sugar
- 1 cup water
- 1 tablespoon lemon juice
- 1 teaspoon vanilla extract (optional)
- A pinch of salt
INSTRUCTIONS
Rinse fresh blueberries or thaw frozen blueberries.
Combine blueberries, sugar, and water in a saucepan and bring to a gentle boil, stirring until sugar dissolves.
Reduce heat and simmer for 10-15 minutes, mashing blueberries to extract flavor.
Strain the mixture through a fine mesh strainer to remove solids.
Stir in lemon juice, vanilla extract (if using), and a pinch of salt.
Allow syrup to cool to room temperature, then refrigerate in a clean bottle or jar.
Serve over shaved or crushed ice.
NOTES
Serve chilled or at room temperature. Enjoy your delicious homemade Homemade Strawberry Snow Cone Syrup!