
Mouth-watering Reese’s Peanut Butter Cup Cheesecake
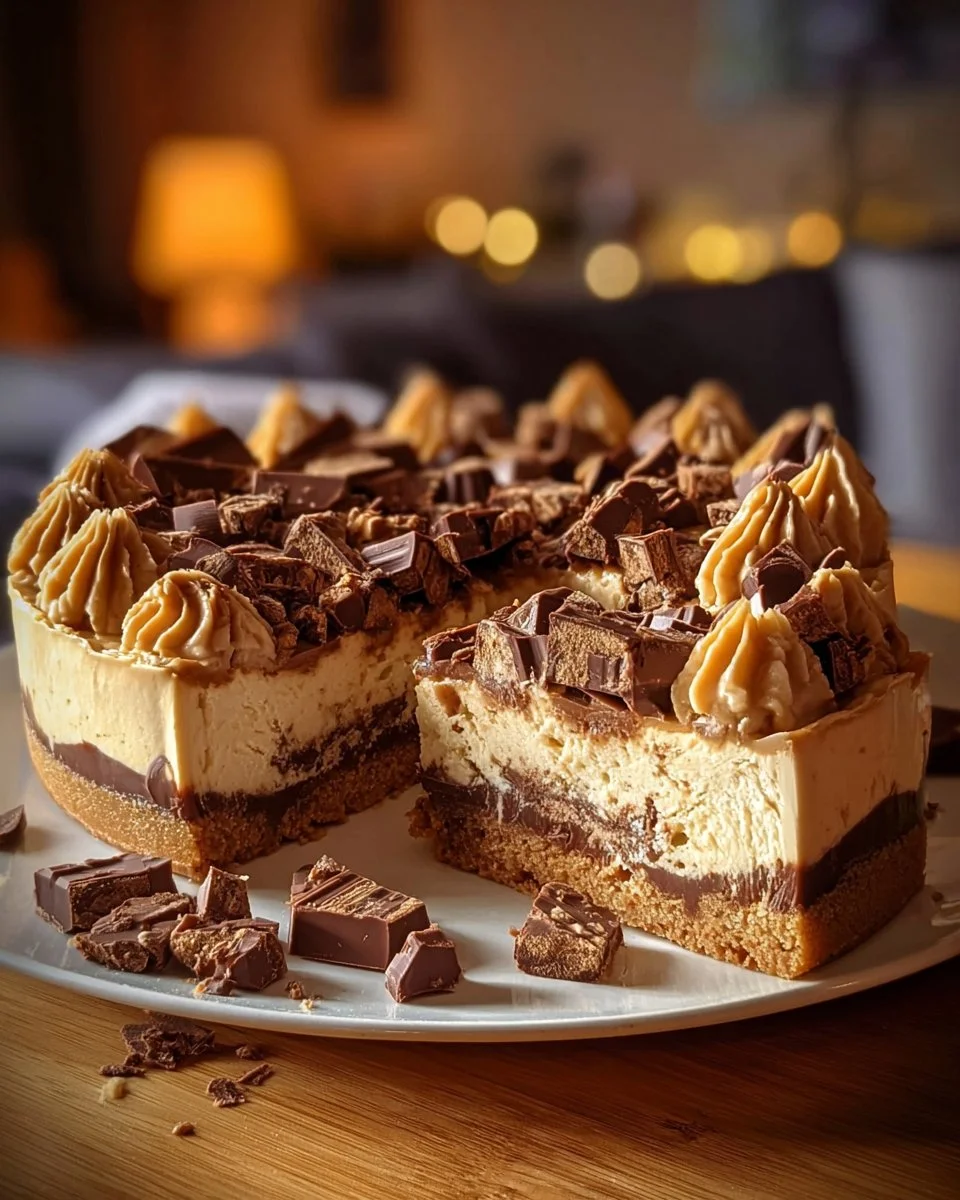
If you’re looking for a dessert that combines the rich flavors of chocolate and peanut butter, look no further than this Mouth-watering Reese’s Peanut Butter Cup Cheesecake. This creamy cheesecake is loaded with Reese’s peanut butter cups and topped with a delicious chocolate ganache. It’s perfect for special occasions or just a sweet treat at home.
Why Make This Recipe
This cheesecake is not only delicious but also incredibly easy to make. It brings together the best of both worlds: the velvety texture of cheesecake and the beloved taste of Reese’s peanut butter cups. Whether you are a peanut butter lover or just someone who enjoys a sweet dessert, this cheesecake will surely impress your friends and family. Plus, it looks stunning, making it a great centerpiece for any dinner table!
How to Make Mouth-watering Reese’s Peanut Butter Cup Cheesecake
Ingredients
- 1 1/2 cups chocolate cookie crumbs
- 1/4 cup melted butter
- 3 (8 oz) packages cream cheese, softened
- 1 cup sugar
- 1 cup sour cream
- 1 tsp vanilla extract
- 3 large eggs
- 1 cup creamy peanut butter
- 15-20 Reese’s peanut butter cups, chopped
- 1 cup heavy cream
- 1/2 cup chocolate chips
- 1/2 cup peanut butter chips
- Caramel sauce for drizzling
- Whipped cream for topping
Directions
Preheat the oven to 325°F (163°C). In a bowl, combine the chocolate cookie crumbs and melted butter. Press the mixture into the bottom of a 9-inch springform pan to form the crust.
In a large mixing bowl, beat the cream cheese and sugar together until smooth. Add the sour cream and vanilla extract, and mix until well combined.
Add the eggs one at a time, beating after each addition. Stir in the peanut butter until the mixture is smooth.
Fold in half of the chopped Reese’s peanut butter cups into the batter. Pour the batter over the prepared crust and smooth the top.
Bake the cheesecake for 55-60 minutes, or until the center is set and the edges are lightly browned. Turn off the oven and let the cheesecake cool in the oven with the door slightly open for 1 hour.
Remove the cheesecake from the oven and let it cool completely at room temperature. Once cooled, refrigerate for at least 4 hours or overnight.
In a small saucepan, heat the heavy cream over medium heat until it begins to simmer. Remove from heat and stir in the chocolate chips until melted and smooth. Let cool slightly.
Drizzle the chocolate ganache over the chilled cheesecake. Top with the remaining chopped Reese’s peanut butter cups, peanut butter chips, and caramel sauce. Add whipped cream for garnish if desired.
How to Serve Mouth-watering Reese’s Peanut Butter Cup Cheesecake
Serve this cheesecake chilled. You can slice it into wedges and place a dollop of whipped cream on top for an extra treat. It pairs well with coffee or a glass of cold milk!
How to Store Mouth-watering Reese’s Peanut Butter Cup Cheesecake
You can store this cheesecake in the refrigerator. Make sure to cover it tightly with plastic wrap or aluminum foil to keep it fresh. It can last up to a week.
Tips to Make Mouth-watering Reese’s Peanut Butter Cup Cheesecake
- Make sure the cream cheese is softened to room temperature for a creamy texture.
- Don’t skip cooling the cheesecake in the oven. This helps prevent cracks on the surface.
- For an impressive topping, go wild with different kinds of candies or nuts along with the Reese’s cups.
Variation
If you want to switch things up, you can replace the chocolate cookie crust with a graham cracker crust or even an Oreo crust for a different flavor. You could also add some crushed pretzels for a salty touch!
FAQs
Can I make this cheesecake ahead of time?
Yes! This cheesecake stores well in the refrigerator, so you can make it a day or two in advance.
Can I freeze the cheesecake?
Yes, you can freeze the cheesecake. Make sure to wrap it well. Thaw it in the refrigerator before serving.
What can I use instead of creamy peanut butter?
You can use crunchy peanut butter for a textured version, or almond butter for a different taste. Just make sure it’s smooth enough to mix well with the cream cheese.
Now you’re all set to enjoy this rich and delightful dessert! Happy baking!
Print
Mouth-watering Reese’s Peanut Butter Cup Cheesecake
- Total Time: 390 minutes
- Yield: 12 servings 1x
- Diet: Vegetarian
Description
A creamy cheesecake featuring Reese’s peanut butter cups and a luscious chocolate ganache, perfect for any occasion.
Ingredients
- 1 1/2 cups chocolate cookie crumbs
- 1/4 cup melted butter
- 3 (8 oz) packages cream cheese, softened
- 1 cup sugar
- 1 cup sour cream
- 1 tsp vanilla extract
- 3 large eggs
- 1 cup creamy peanut butter
- 15–20 Reese’s peanut butter cups, chopped
- 1 cup heavy cream
- 1/2 cup chocolate chips
- 1/2 cup peanut butter chips
- Caramel sauce for drizzling
- Whipped cream for topping
Instructions
- Preheat the oven to 325°F (163°C). In a bowl, combine the chocolate cookie crumbs and melted butter. Press the mixture into the bottom of a 9-inch springform pan to form the crust.
- In a large mixing bowl, beat the cream cheese and sugar together until smooth. Add the sour cream and vanilla extract, and mix until well combined.
- Add the eggs one at a time, beating after each addition. Stir in the peanut butter until the mixture is smooth.
- Fold in half of the chopped Reese’s peanut butter cups into the batter. Pour the batter over the prepared crust and smooth the top.
- Bake the cheesecake for 55-60 minutes, or until the center is set and the edges are lightly browned. Turn off the oven and let the cheesecake cool in the oven with the door slightly open for 1 hour.
- Remove the cheesecake from the oven and let it cool completely at room temperature. Once cooled, refrigerate for at least 4 hours or overnight.
- In a small saucepan, heat the heavy cream over medium heat until it begins to simmer. Remove from heat and stir in the chocolate chips until melted and smooth. Let cool slightly.
- Drizzle the chocolate ganache over the chilled cheesecake. Top with the remaining chopped Reese’s peanut butter cups, peanut butter chips, and caramel sauce. Add whipped cream for garnish if desired.
Notes
Ensure cream cheese is at room temperature for optimal texture. Cooling in the oven helps prevent cracks.
- Prep Time: 30 minutes
- Cook Time: 60 minutes
- Category: Dessert
- Method: Baking
- Cuisine: American
Nutrition
- Serving Size: 1 slice
- Calories: 450
- Sugar: 38g
- Sodium: 350mg
- Fat: 32g
- Saturated Fat: 15g
- Unsaturated Fat: 12g
- Trans Fat: 0g
- Carbohydrates: 38g
- Fiber: 2g
- Protein: 8g
- Cholesterol: 75mg
Keywords: cheesecake, dessert, peanut butter, chocolate, sweets