
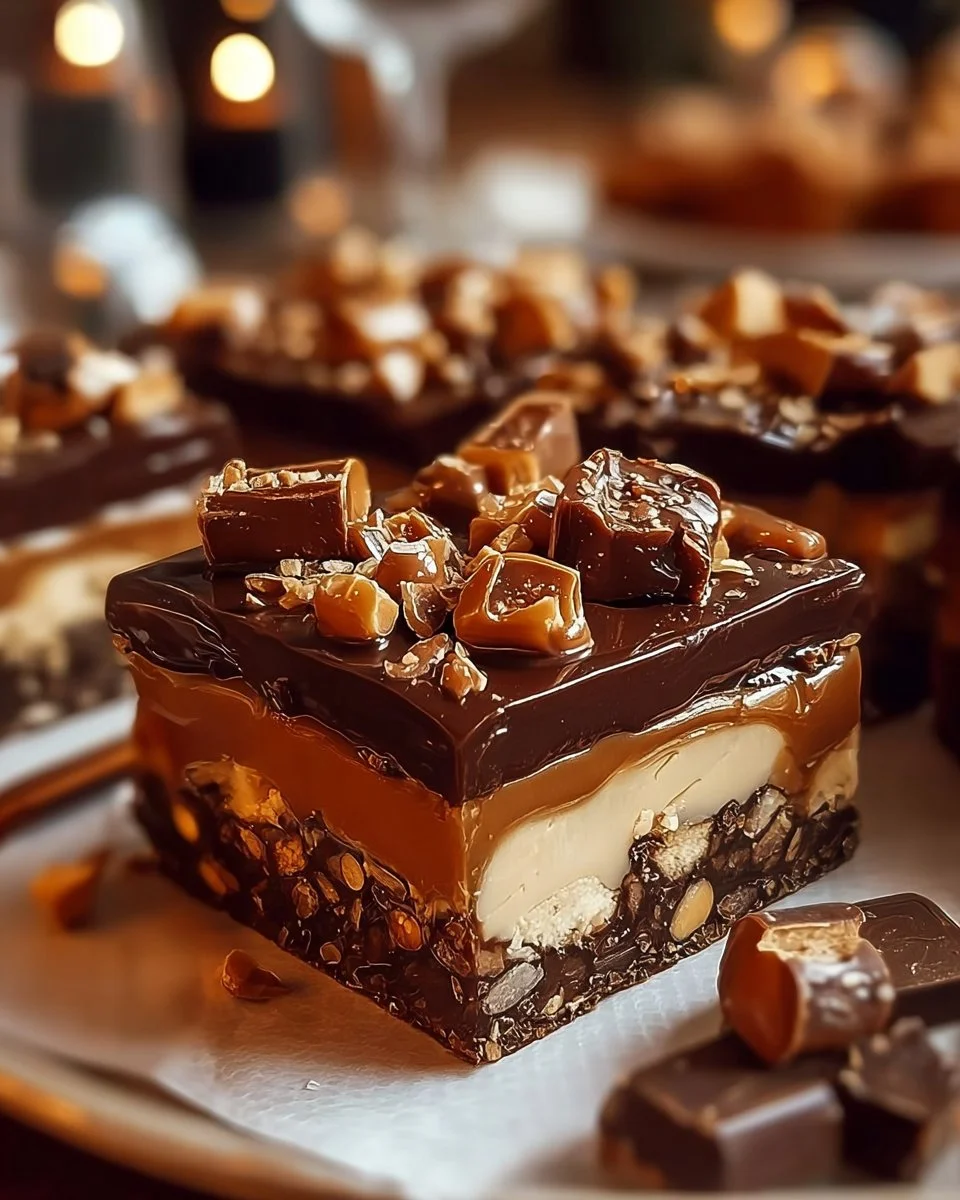
Reese’s Butterfinger Cheesecake Bars
Introduction
If you love chocolate and peanut butter, then you are in for a treat with Reese’s Butterfinger Cheesecake Bars. These delicious bars combine the creamy taste of cheesecake with the crunch and sweetness of Reese’s and Butterfinger candies. Perfect for any occasion, they are sure to satisfy your sweet tooth!
Why Make This Recipe
This recipe is a perfect choice if you want to impress your friends and family with something easy yet incredibly tasty. The combination of chocolate, peanut butter, and a buttery crust makes these bars hard to resist. Plus, they are great for parties, gatherings, or just a delicious dessert at home!
How to Make Reese’s Butterfinger Cheesecake Bars
Ingredients:
- 1 1⁄2 cups graham cracker crumbs
- 1⁄4 cup sugar
- 1⁄3 cup melted butter
- 2 cups cream cheese, softened
- 1⁄2 cup sugar
- 1 tsp vanilla extract
- 2 large eggs
- 1⁄2 cup chopped Reese’s peanut butter cups
- 1⁄2 cup chopped Butterfinger bars
- 1 cup heavy cream
- 1 1⁄2 cups semi-sweet chocolate chips
Directions:
- Prep the Pan: Preheat your oven to 350°F (175°C) and line a 9×13-inch baking pan with parchment paper.
- Make the Crust: In a bowl, mix together the graham cracker crumbs, sugar, and melted butter until everything is combined. Press this mixture evenly into the bottom of the prepared pan.
- Make the Cheesecake Filling: In a large bowl, beat the cream cheese, sugar, and vanilla extract until smooth. Add the eggs one at a time, mixing well after each addition. Fold in the chopped Reese’s and Butterfinger pieces. Pour this mixture over the crust, spreading it evenly.
- Bake the Cheesecake: Bake for 30-35 minutes until the center is set. Allow the bars to cool completely.
- Prepare the Ganache: Heat the heavy cream in a saucepan over medium heat until it is hot but not boiling. Remove from heat and stir in the chocolate chips until smooth and glossy.
- Add the Ganache: Pour the ganache over the cooled cheesecake bars, spreading it evenly with a spatula. Refrigerate for at least 2 hours, or until the ganache is set.
- Slice & Serve: Cut the bars into squares and enjoy this rich, sweet, candy-filled goodness!
How to Serve Reese’s Butterfinger Cheesecake Bars
These cheesecake bars are best served chilled. You can enjoy them as a dessert on their own, or pair them with a scoop of vanilla ice cream for an extra special treat.
How to Store Reese’s Butterfinger Cheesecake Bars
Store the cheesecake bars in an airtight container in the refrigerator. They will stay fresh for about 5-7 days. You can also freeze them for up to 3 months. Just make sure to wrap them well.
Tips to Make Reese’s Butterfinger Cheesecake Bars
- For a smoother filling, make sure your cream cheese is softened to room temperature.
- You can crush the candy bars into smaller pieces to distribute them more evenly in the cheesecake.
- Allow the ganache to cool slightly before pouring it over the cheesecake for easier spreading.
Variation
If you want to switch things up, try using different types of candy bars like Snickers or Milky Way instead of Reese’s and Butterfinger. You can also add a layer of nuts for extra crunch!
FAQs
1. Can I use a different type of crust?
Yes! You can use Oreo cookies or any other cookies you like to make the crust.
2. How can I make these bars more chocolatey?
You can add more chocolate chips to the filling or use a chocolate crust for a deeper chocolate flavor.
3. Can I make these ahead of time?
Absolutely! You can make them up to a day in advance. Just store them in the refrigerator until you’re ready to serve.
Enjoy making and sharing these delightful Reese’s Butterfinger Cheesecake Bars!
Print
Reese’s Butterfinger Cheesecake Bars
- Total Time: 50 minutes
- Yield: 12 servings 1x
- Diet: Vegetarian
Description
Delicious cheesecake bars combining creamy cheesecake with crunchy Reese’s and Butterfinger candies, perfect for any occasion.
Ingredients
- 1 1⁄2 cups graham cracker crumbs
- 1⁄4 cup sugar
- 1⁄3 cup melted butter
- 2 cups cream cheese, softened
- 1⁄2 cup sugar
- 1 tsp vanilla extract
- 2 large eggs
- 1/2 cup chopped Reese’s peanut butter cups
- 1/2 cup chopped Butterfinger bars
- 1 cup heavy cream
- 1 1⁄2 cups semi-sweet chocolate chips
Instructions
- Preheat your oven to 350°F (175°C) and line a 9×13-inch baking pan with parchment paper.
- In a bowl, mix together the graham cracker crumbs, sugar, and melted butter until combined. Press this mixture evenly into the bottom of the prepared pan.
- In a large bowl, beat the cream cheese, sugar, and vanilla extract until smooth. Add the eggs one at a time, mixing well after each addition. Fold in the chopped Reese’s and Butterfinger pieces. Pour this mixture over the crust, spreading it evenly.
- Bake for 30-35 minutes until the center is set. Allow the bars to cool completely.
- Heat the heavy cream in a saucepan over medium heat until hot, then remove from heat and stir in the chocolate chips until smooth and glossy.
- Pour the ganache over the cooled cheesecake bars, spreading it evenly with a spatula. Refrigerate for at least 2 hours, or until the ganache is set.
- Cut the bars into squares and enjoy!
Notes
Store the cheesecake bars in an airtight container in the refrigerator for 5-7 days or freeze for up to 3 months.
- Prep Time: 15 minutes
- Cook Time: 35 minutes
- Category: Dessert
- Method: Baking
- Cuisine: American
Nutrition
- Serving Size: 1 bar
- Calories: 400
- Sugar: 25g
- Sodium: 300mg
- Fat: 25g
- Saturated Fat: 12g
- Unsaturated Fat: 13g
- Trans Fat: 0g
- Carbohydrates: 45g
- Fiber: 2g
- Protein: 6g
- Cholesterol: 80mg
Keywords: cheesecake bars, dessert, chocolate, peanut butter, Butterfinger